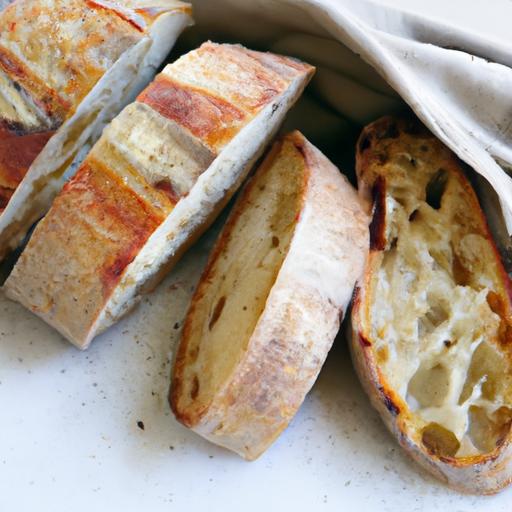


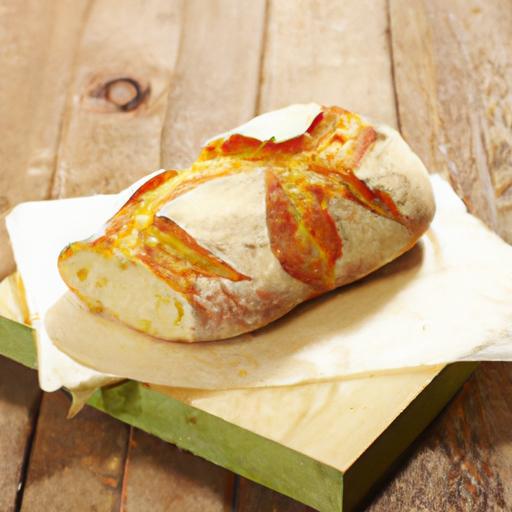
There’s something undeniably enchanting about the humble loaf of rustic Italian crusty bread – its golden, crackling crust conceals a tender, aromatic heart that has been perfected through generations. Unlocking the art of this timeless staple is more than just a baking endeavor; it’s a journey into the soul of Italy’s culinary heritage.From the careful selection of simple ingredients to the alchemy of fermentation and the mastery of the oven’s heat, crafting this bread is both science and magic. In this article, we’ll delve into the secrets behind achieving that perfectly blistered crust and airy crumb, revealing techniques that transform ordinary dough into an unusual sensory experience. Whether you’re a seasoned baker or a curious novice, prepare to uncover the rustic charm and irresistible allure of Italian crusty bread.
Unlocking the Art of Rustic Italian Crusty Bread Magic begins with a profound recognition for the elements that breathe life into this timeless loaf. Rooted in centuries-old traditions from the italian countryside, this bread embodies simplicity and character - a golden crust whispering tales of crackling ovens and centuries of artisan craft. Its rustic charm lies in the perfect balance of dough texture, optimal hydration, and patient fermentation, all culminating in a loaf that sings with crackly crust and a tender, open crumb.
Prep and Cook Time
- Planning: 25 minutes
- Fermentation & Proofing: 12-18 hours (overnight recommended)
- Baking: 35-40 minutes
- Total Time: Approximately 14-16 hours (mostly hands-off)
Yield
One rustic Italian loaf, approximately 800g, serving 8 slices
Difficulty Level
Medium – perfect for adventurous home bakers eager to master artisan techniques
Ingredients
- 500g bread flour, preferably Italian Tipo 00 or high-protein bread flour
- 375ml cool water (about 75% hydration)
- 10g sea salt
- 5g active dry yeast or instant yeast
- Extra flour for dusting and shaping
Instructions
- Mix the dough. In a large bowl, combine the bread flour and yeast.Gradually add the cool water and stir with a wooden spoon or dough whisk until no dry flour remains.The dough will feel sticky and shaggy – this moisture level is key for that iconic open crumb.
- Autolyse phase. Cover the bowl with a damp cloth and let the dough rest 30 minutes. This step hydrates the flour fully, contributing to gluten advancement and flavour.
- Add salt and knead. Sprinkle the sea salt evenly over the dough.Using wet hands, incorporate salt using a fold-and-stretch technique inside the bowl – no traditional kneading required.Perform four stretch-and-fold cycles every 30 minutes over two hours to build elasticity.
- Bulk fermentation. Cover the dough and leave it to ferment at room temperature (ideally 70°F/21°C) for 12 hours or overnight. During this slow ferment, natural yeast activity deepens flavor and creates those elusive air pockets.
- Shape the loaf. Flour your work surface and gently dump the dough onto it. Using a bench scraper, fold the dough to form tension on its surface. Shape it into a round boule,being careful not to deflate the dough to much.
- Final proof. Place the shaped dough seam side up in a well-floured banneton basket or a bowl lined with a floured kitchen towel. Let it proof for 1.5 – 2 hours until puffy but not overgrown.
- Preheat the oven. Place a Dutch oven or heavy oven-safe pot with lid inside your oven and preheat at 475°F (245°C) for at least 45 minutes-this creates the fiery habitat needed for crust formation.
- Transfer and score. Carefully invert your dough onto parchment paper. Using a razor blade or sharp knife, score a deep slash across the top-this controls blooming during baking and adds rustic character.
- Bake covered. Place the dough (with parchment) into the hot Dutch oven, cover with the lid, and bake for 20 minutes. The covered environment traps steam,ensuring an airy crumb and a shiny,crispy crust.
- Finish baking uncovered. Remove the lid and bake for another 15-20 minutes until the crust deepens to a rich golden-brown, crackling beautifully when tapped.
- Cool thoroughly. Transfer your loaf to a wire rack. Allow at least 1 hour to cool before slicing-this is crucial for flavor development and crumb setting.
Tips for success
- Hydration control: Adjust water slightly depending on your flour and humidity. Too dry, and the crumb will close up; too wet, and the dough becomes unmanageable.
- Temperature matters: Cooler fermentation slows yeast activity improving flavor complexity. If your kitchen is warm, consider fermenting in a cooler spot.
- Use a digital scale: Precision is key; weighing ingredients guarantees consistent results.
- Don’t skip the resting phases: Autolyse and stretch-and-fold techniques develop gluten structure without heavy kneading.
- Invest in a banneton or proofing basket: This supports shaped dough during proofing and encourages lovely ridges on the crust.
- If you don’t have a Dutch oven: Create steam by placing a pan of hot water in the oven or spritzing water during the first 10 minutes of baking.
- Storage tip: Once completely cooled, store in a paper bag to keep crust crisp. Avoid plastic to prevent sogginess.
Serving Suggestions
This rustic Italian crusty bread is an irresistible centerpiece to any meal. Serve it torn apart alongside a bowl of velvety tomato basil soup, or as an inviting base for bruschetta with ripe heirloom tomatoes, fresh basil, and a drizzle of extra virgin olive oil. For a simple yet elegant snack, slice thickly and toast with crushed garlic and a sprinkle of flaky sea salt.Garnish with sprigs of rosemary or a scattering of coarse sea salt to enhance visual appeal and aroma. Pair with robust extra virgin olive oil for dipping, or creamy ricotta topped with cracked black pepper and a drizzle of wildflower honey for a delightful contrast.

| Nutrient | Per Serving (1 slice) |
|---|---|
| Calories | 180 kcal |
| Protein | 6g |
| Carbohydrates | 37g |
| Fat | 1g |
For a deeper understanding of fermentation’s impact on artisan bread,King Arthur Baking’s fermentation guide is an outstanding resource. Meanwhile, explore our full guide on bread making basics to expand your baking repertoire.
Q&A
Q&A: unlocking the Art of Rustic Italian Crusty Bread Magic
Q1: What makes rustic Italian crusty bread so uniquely magical?
A: It’s all about the perfect harmony between a deeply caramelized, crackling crust and a soft, airy crumb inside.The magic lies in simple,quality ingredients combined with time-honored techniques-slow fermentation,high hydration doughs,and baking with steam-to create a loaf that feels both ancient and alive with flavor.
Q2: What are the essential ingredients for an authentic rustic Italian crusty bread?
A: The magic starts simply: flour (usually strong bread flour or a mix with whole wheat), water, salt, and natural yeast or a sourdough starter.No fancy additives or preservatives-just the elemental quartet that transforms through patience and skill.
Q3: How importent is the fermentation process in achieving that crusty, flavorful bread?
A: Fermentation is the heartbeat of rustic bread. Allowing the dough to ferment slowly-sometimes overnight or longer-develops complex flavors and aromas. It also helps build gluten structure for that chewy crumb, and enhances the crust’s deep golden color during baking.
Q4: Can I recreate this rustic magic at home without specialized equipment?
A: absolutely! While traditional Italian ovens add authenticity, a home oven can work wonders. Using a cast-iron dutch oven or a baking stone can imitate professional heat retention. Adding steam in the early stage of baking-by tossing water into a preheated tray or covering the dough-helps form that iconic crust.
Q5: What’s the secret to getting a crackling crust that snaps delightfully when you break the bread?
A: The crackle is born from a crispy crust formed under steam and high heat, combined with a well-hydrated dough. The moisture trapped in the dough bursts out when baking, creating that tantalizing “pop” of crust. The key is baking the loaf long enough to dry out the surface without burning.
Q6: How does hydration affect the final bread texture?
A: Higher hydration doughs (meaning more water relative to flour) produce bread with an open, airy crumb full of irregular holes-like those artisanal Italian loaves you adore. However, such doughs are stickier and trickier to handle, so gentle folding and patience during fermentation are essential.
Q7: Are there any traditional techniques involved that elevate this bread above ordinary loaves?
A: Yes-the folding and shaping methods, known as “stretch and fold,” nurture gluten development without aggressive kneading. Also, the long proofing times at cool temperatures let yeast and bacteria work together to deepen flavor and texture.
Q8: How can I tell when my rustic Italian bread is perfectly baked?
A: A fully baked loaf will sound hollow when tapped on the bottom, have a dark golden crust with natural fissures, and feel surprisingly light for its size. The aroma is robust-a mix of nutty toasted notes and a whisper of earthiness.
Q9: can rustic Italian crusty bread be adapted for dietary preferences like gluten-free or whole grain?
A: While traditional rustic bread relies on gluten development for structure, whole grain flours can be incorporated to add complexity and nutrition. Gluten-free versions require different techniques and binders, and while they don’t replicate the exact texture, they can channel the spirit of rustic Italian bread through careful ingredient blending.
Q10: What’s the best way to enjoy rustic Italian crusty bread once it’s out of the oven?
A: Let it cool to allow the crumb to set, then slice generously.Its pure flavor sings with simple accompaniments-extra virgin olive oil, fresh tomatoes, or robust cheeses. The bread itself is a canvas for creativity, inviting endless tasty possibilities.
Concluding Remarks
As the last crumbs fall away,the magic of rustic Italian crusty bread reveals itself-not just in its golden,crackling crust or its airy,tender crumb,but in the timeless traditions and simple ingredients that bring it to life.Unlocking this art is more than baking; it’s a journey through history,culture,and patience. So, whether you’re a seasoned baker or an eager novice, embrace the rhythm of the dough, the scent of the hearth, and the joy of sharing a loaf crafted by your own hands. In every crusty bite lies a story waiting to be told-one that connects you to a centuries-old craft and the heart of Italy itself.Happy baking, and may your kitchen always be filled with the magic of crusty bread.