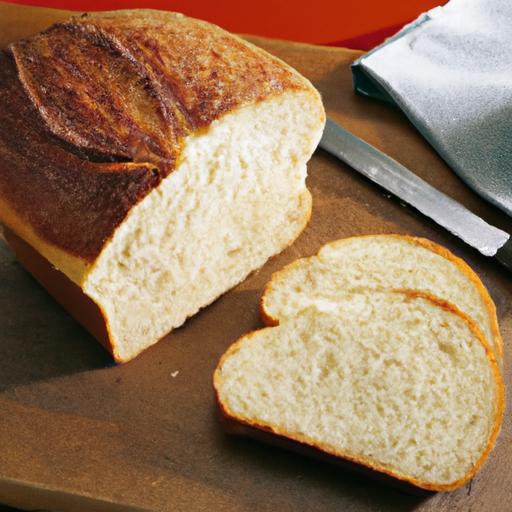


There’s something profoundly comforting about the smell of freshly baked white bread wafting through your kitchen-a warm, golden loaf with a tender crumb that promises to elevate even the simplest of meals. Yet, achieving that perfect balance of crust and softness at home can sometimes feel elusive. enter the humble bread machine: a modern marvel that transforms a handful of basic ingredients into bakery-quality bread with the push of a button. In this article, we’ll unlock the secrets to mastering the art of perfect white bread using your bread machine, blending scientific precision with culinary intuition so you can enjoy consistently flavorful, homemade loaves every time. Whether you’re a novice baker or a seasoned pro, get ready to bake your way to bread bliss.
mastering the Art of Perfect White Bread in Your Bread Machine begins with an intimate understanding of selecting the ideal ingredients that coax out both fluffiness and vibrant flavor. White bread, with its tender crumb and golden crust, holds a timeless charm in every home kitchen, and cracking the code to its perfect texture is easier than you might think-especially when armed with the right components. Whether you’re savoring the smell as the dough rises or relishing the first warm slice, the secret lies deep in those foundational choices.
Prep and Cook Time
- preparation: 10 minutes
- Mixing & Kneading (Bread Machine): 15 minutes
- First rise: 1 hour 30 minutes (machine dependent)
- Baking: 30-40 minutes
- Total Time: Approximately 2 hours 30 minutes
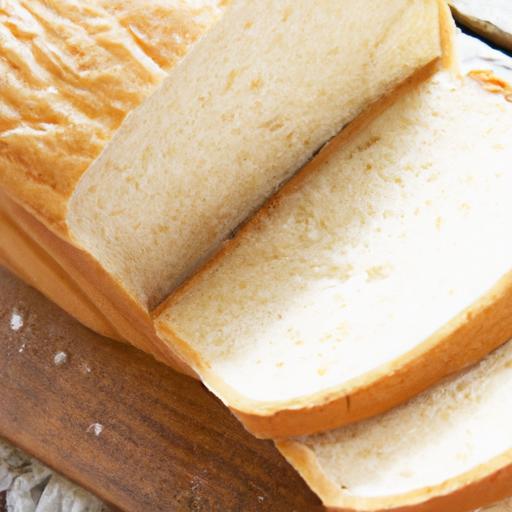
Yield
One 1.5-pound loaf, serving approximately 12 slices
Difficulty Level
Easy – perfect for absolute beginners or those refining their bread machine skills
Ingredients
- 3 cups bread flour, sifted for lightness
- 1 ¼ cups warm water (110°F / 43°C)
- 2 tbsp granulated sugar – balances flavor and aids yeast fermentation
- 1 tbsp unsalted butter, softened - enriches crumb softness
- 1 ½ tsp fine sea salt – essential for flavor depth and gluten control
- 2 tsp active dry yeast – for that perfect rise and airy structure
- Optional: 1 tbsp milk powder to enhance browning and tenderness
Instructions
- Prepare your bread machine: Ensure the baking pan is clean and the kneading paddle is securely in place. Every bread machine differs slightly, so consult your manual for loading order.
- Add liquid ingredients first: Pour warm water carefully into the baking pan to create a welcoming habitat for the yeast.
- Incorporate dry ingredients next: Add sifted bread flour evenly, then sprinkle sugar, salt, and milk powder (if using) into distinct corners of the pan to prevent premature yeast contact.
- Activate the yeast: Make a small well in the center of the flour mound and add the yeast-this keeps it separate until kneading begins.
- Add butter: Dot softened butter over the flour’s surface to melt gently during kneading, infusing richness.
- Start the bread machine: Select the “Basic White Bread” cycle,medium crust setting,and press start. Watch the first few minutes of kneading; the dough should form a slightly tacky, smooth ball-adjust with a teaspoon of water or flour if necessary.
- Monitor dough consistency: If too sticky or dry, pause the machine and carefully add flour or water in small increments. Consistency is key to fluffy crumb and proper gluten development.
- Allow the machine to complete rise and bake: Resist opening the lid during the baking stage to maintain temperature and moisture.
- Remove loaf promptly when finished: use oven mitts to lift the pan and gently invert the loaf onto a cooling rack to prevent sogginess on the bottom crust.
- Cool wholly before slicing: This final step ensures the crumb sets perfectly for clean, soft slices.
Tips for Success: Unlocking the Secrets of Dough Consistency and Texture
- Flour choice matters: using high-protein bread flour rather than all-purpose flour builds stronger gluten networks, lending to that iconic white bread fluffiness.
- Water temperature control: Keep water between 105-115°F to awaken yeast without killing it, fueling a lively first rise.
- Butter enhances tenderness: Adding softened butter or a subtle oil like avocado can elevate crumb softness without weighing it down.
- Salt balances flavor and controls yeast: Don’t skip salt; it regulates yeast activity and deepens the final flavor profile.
- Adjusting dough: Bread machines may require tweaking. if dough looks dry or cracking during kneading, add a teaspoon of water. Conversely, minute flour additions can rescue overly sticky dough.
- Crust perfection: For a golden crust, opt for the medium crust baking setting. If your machine lacks this,brush the dough surface lightly with milk or water before baking to encourage browning.
- timing and temperature: Avoid rapid cooling by removing the loaf promptly and letting it cool on a rack-trapped steam results in a soggy crust.
Troubleshooting Common White Bread Baking Issues
- Dense, heavy bread: may indicate inactive yeast or too much flour. Always ensure yeast is fresh and measure flour accurately, fluffing it before spooning in.
- Crumbly or dry texture: Often due to insufficient hydration or overbaking. Verify water temperature, and consider reducing baking time by 5 minutes if dry.
- Flat or no rise: Yeast may be too old or water temperature too hot. Test yeast by proofing in warm water and sugar before cooking.
- Uneven crust coloring: Open your machine only when necessary; premature lid opening disrupts heat flow and steam accumulation.
Serving Suggestions
This fluffy, flavorful white bread shines best when sliced thick and served warm. Enhance your presentation with a pat of butter melting slowly on each slice, or layer with homemade fruit preserves, creamy nut butters, or ripe avocado spreads. Garnish with fresh rosemary sprigs or a sprinkle of flaky sea salt for an artisanal touch.Pair beautifully with hearty soups or your favorite sandwiches, making every meal irresistibly fresh and inviting.
| Nutrition per Slice (approx.) | Calories | Protein | Carbs | Fat |
|---|---|---|---|---|
| White Bread | 90 kcal | 3 g | 17 g | 1 g |
For a deeper dive into the science of yeast baking, visit the King Arthur Baking guide. For more kitchen-tested bread machine recipes, explore our Bread Machine Essentials collection.

Q&A
Q&A: Mastering the art of Perfect White Bread in Your Bread Machine
Q1: What’s the secret to making perfect white bread with a bread machine?
The secret lies in balancing your ingredients and respecting the sequence of adding them. Use high-quality bread flour for that ideal gluten structure, fresh yeast for optimal rise, and precise measurements to maintain the right dough consistency. Always add liquids first, then dry ingredients, and yeast last-keeping it away from salt and sugar until mixing begins-to ensure a perfect loaf every time.
Q2: Can I use regular all-purpose flour instead of bread flour in my bread machine?
While all-purpose flour can work, bread flour is your best bet for that classic white bread texture. Bread flour’s higher protein content helps develop stronger gluten strands, giving your bread a chewier crumb and better rise. If all you have is all-purpose flour, consider adding a bit of vital wheat gluten to boost that protein level and achieve a similar affect.
Q3: How do I know if my dough is the right consistency during the kneading cycle?
The dough should form a smooth, slightly tacky ball that cleans the sides of the bread machine pan without sticking excessively. If the dough appears too wet and sticky, add flour little by little; if too dry and crumbly, add small amounts of water. Many bread machines allow you to pause and check-a handy feature to perfect your dough’s feel early on.
Q4: What kind of yeast should I use, and how much?
Active dry yeast and instant yeast both work well in bread machines, but instant yeast is frequently enough preferred as it mixes directly with dry ingredients and activates faster. Typically,1 to 2 teaspoons of yeast per loaf is enough. Make sure your yeast is fresh; expired yeast can lead to a dense,under-risen loaf.
Q5: Can I add extras like seeds or herbs to my white bread recipe in the bread machine?
Absolutely! Adding sesame seeds, poppy seeds, rosemary, or garlic powder can elevate your white bread from simple to sensational. Your bread machine’s “add-in” beep signals the perfect time to toss in these extras, generally during the kneading cycle, so they’re evenly distributed without disrupting the dough’s texture.Q6: Why is measuring ingredients by weight recommended over volume?
Baking is a precise science.Measuring by weight ensures accuracy, eliminating variations caused by how compacted flour or sugar might be in a measuring cup. Using a kitchen scale guarantees consistent results-each loaf matches the last in flavor and texture.
Q7: How can I get a nice golden crust on my white bread?
Most bread machines have crust settings-light, medium, and dark. Experiment to find your ideal shade.If you want a slightly shinier crust, brushing the loaf with a bit of melted butter or milk right after baking adds a tender finish and lovely sheen.
Q8: What mistakes should I avoid when making white bread in a bread machine?
Avoid rushing the process by opening the lid frequently-it disrupts the rising cycle. Also, don’t substitute ingredients last minute without adjusting liquids or yeast accordingly. Too much salt can kill yeast; too little could result in bland bread. double-check ingredient freshness-stale flour or old yeast spells trouble.
Q9: can I customize the bread machine’s baking time for different loaf sizes?
Many machines have loaf size settings, such as 1 lb, 1.5 lb, or 2 lb. Choose the size that best fits the amount of dough you’re making. If your recipe is outside the usual sizes, you might need to tweak rising or baking times to avoid underbaked or overly dense bread.
Q10: What’s the best way to store my freshly baked white bread?
Allow the bread to cool completely on a wire rack before storing to prevent condensation. Wrap the loaf in a clean cotton tea towel or place it in a bread box to maintain crust crispness.For longer storage, slice and freeze bread in an airtight bag-toast slices directly from the freezer for a fresh-baked experience anytime!
The Way Forward
as you close the lid and hear the final hum of your bread machine, you’re not just ending a baking cycle-you’re celebrating the timeless craft of perfect white bread. With patience, precision, and the right techniques, your kitchen appliance transforms simple ingredients into a golden, aromatic loaf that rivals any bakery’s finest. Mastering this art isn’t merely about following a recipe; it’s about understanding the delicate dance of yeast, flour, and time within your machine’s warm embrace. So, armed with these insights and a dash of curiosity, may every loaf you create rise to new heights of delicious perfection-turning humble white bread into your own everyday masterpiece. Happy baking!