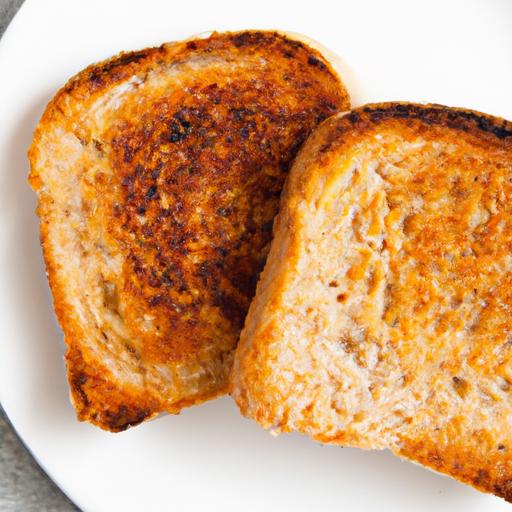


There’s something undeniably satisfying about biting into a perfectly toasted slice of bread-crispy on the outside, tender adn warm within, with just the right hint of golden crunch. While the humble toaster often takes the spotlight, the oven holds untapped potential for achieving toast that’s evenly browned, irresistibly crisp, and bursting with flavor.Whether your prepping slices for a savory bruschetta, a classic avocado toast, or simply craving a buttery breakfast companion, mastering the art of oven toast can elevate your kitchen game. In this guide, we’ll dive into the tips and tricks that turn ordinary bread into unusual, crispy delights, revealing how to use your oven to craft perfect slices every time.
Mastering oven toast begins with a keen understanding of how to select the right bread,set your oven for even toasting,time the process perfectly,and elevate flavor with thoughtful toppings. Achieving that coveted crunch is an art form that’s as much about technique as it is about choice-whether it’s a crusty sourdough or a soft whole wheat slice, each loaf brings unique textures and taste profiles that sing when toasted just right.
Choosing the right Bread for Ultimate Crunch
Not all breads are created equal when it comes to achieving crisp, golden slices. Opt for artisan varieties like sourdough or country white that boast a dense crumb and sturdy crust to withstand the dry heat of the oven while delivering that satisfying snap. Avoid overly soft sandwich breads which can become soggy or unevenly toasted. Multigrain breads, with their nutty texture and wholesome flavor, also perform beautifully, adding a complex crunch.
For the crispiest results, slice bread about ¾-inch thick; too thin and the slice dries out too fast, too thick and it can stay chewy inside.

Optimal Oven Settings for Even Toasting
Set your oven to a moderate temperature of 350°F (175°C). This balance ensures your slices toast evenly without burning on the edges or leaving the center underdone. Use the middle rack for consistent heat exposure and consider placing a baking sheet underneath to catch crumbs and prevent burning on the oven floor.
For extra evenness, flipping the slices halfway through is a helpful trick that encourages uniform golden hues and texture on both sides.
Timing Tricks to Achieve Golden Perfection
Timing is everything-start by toasting your bread for about 8-10 minutes,flipping after 5 minutes for an even crust. Keep a close eye during the last two minutes to capture that perfect amber shade. Oven temperatures and bread moisture can affect times slightly, so trust your senses and the visual cues for best results.
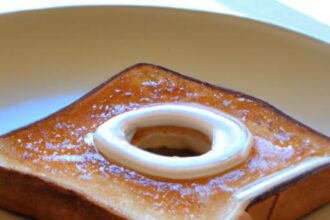
A handy tip: if you desire an ultra-crisp exterior with a tender crumb, lightly brush the bread with olive oil or melted butter prior to baking. This adds richness and enhances browning without sacrificing crunch.
Enhancing Flavor with Creative Toppings and Techniques
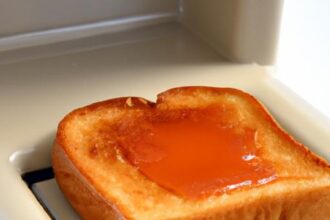
Onc your bread achieves peak crunch,it’s the perfect canvas for creative finishing touches. Spread creamy avocado mash with a sprinkle of chili flakes for a modern twist or classic butter and sea salt flakes to accentuate the toasted flavor. For something sweet, a layer of honey and smashed fresh berries creates a vibrant contrast.
Consider layering before baking: thinly sliced garlic or rosemary infused olive oil brushed on before toasting infuses subtle aromatics deep into the crumb. For a decadent finish, add crumbled feta or a drizzle of aged balsamic vinegar after baking. The possibilities are endless and elevate simple oven toast into a sophisticated snack or meal starter.
Prep and Cook Time
- Prep: 5 minutes
- Cook: 10 minutes
- Total: 15 minutes
Yield
Serves 2-4 slices, depending on thickness and appetite
Difficulty Level
easy - ideal for all skill levels, even beginners
Ingredients
- 4 slices artisan bread (sourdough, country white, or multigrain, about ¾-inch thick)
- 2 tbsp olive oil or melted unsalted butter (optional, for brushing)
- Sea salt flakes, to taste
- Creative toppings: mashed avocado, chili flakes, honey, fresh berries, crumbled feta, rosemary sprigs
Instructions
- Preheat your oven to 350°F (175°C) and position the rack in the center.
- Place the bread slices on a baking sheet. If desired, lightly brush each slice with olive oil or melted butter to encourage browning and flavor depth.
- Toast the bread for 5 minutes, then carefully flip slices and continue baking for another 3-5 minutes, watching for a golden-brown finish.
- Remove from oven and immediately sprinkle lightly with sea salt flakes to enhance the flavor contrast.
- Add your favorite toppings while the toast is still warm-avocado mash with chili flakes or honey with berries work beautifully at this stage.
- Serve immediately to maintain ultimate crunch and enjoy the harmonious layers of texture and taste.
Tips for Success
- Choosing bread: Avoid pre-sliced, packaged bread to control thickness and freshness. Visit local bakeries for the best artisan options.
- Prevent sogginess: Toast bread within 24 hours of slicing; stale bread crisps better and toasts more evenly.
- Make-ahead: Toast bread slices can be kept warm or refreshed by a fast 1-2 minute blast in a hot oven before serving.
- Variations: Experiment with nut butters and sliced bananas for a sweet brunch feel, or whipped ricotta with lemon zest and cracked pepper for savory elegance.
- Equipment: A baking stone or pizza steel will amplify even heat distribution for thicker slices.
Serving Suggestions
Arrange your crisp toast on rustic wooden boards or colorful ceramic plates for visual appeal. Garnish with fresh herbs like rosemary or microgreens to add pops of color and freshness. Pair with sides like scrambled eggs, roasted cherry tomatoes, or a crisp green salad to round out a satisfying meal. For added indulgence, a drizzle of balsamic reduction gives a sweet tangy finish that complements the crunch beautifully.
| Nutrient | Per 1 Slice |
|---|---|
| Calories | 110 |
| Protein | 3g |
| carbohydrates | 20g |
| Fat | 2.5g |
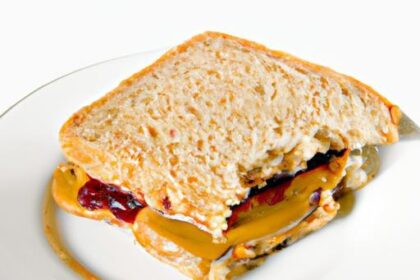
For further inspiration on perfect toasting techniques,explore our comprehensive guide on toasted sandwiches to round out your mastery of crunchy bread delights.
Q&A
Q&A: Mastering Oven Toast – crispy Bread Tips for Perfect Slices
Q1: Why choose the oven over a toaster for making toast?
A1: The oven offers unparalleled control and consistency, allowing you to achieve an even, golden crisp on every slice. Unlike a toaster, the oven can handle thicker slices, specialty breads, and batch toasting with ease-perfect for when you’re serving a crowd or craving that extra crunch.
Q2: What types of bread work best for oven toasting?
A2: almost any bread transforms wonderfully in the oven, but rustic loaves like sourdough, ciabatta, or multigrain shine brightest.Their hearty structure crisps nicely while maintaining a tender crumb inside, giving you a satisfying contrast between crust and softness.Q3: How do I set my oven to get the perfect toast?
A3: Preheat your oven to 375°F (190°C) and place the bread slices on a wire rack atop a baking sheet. This setup allows hot air to circulate evenly, crisping both sides beautifully. Toast for about 5-7 minutes, flipping halfway for balanced coloration and crunch.
Q4: Can I add flavor to my oven toast while baking?
A4: Absolutely! Brush your bread lightly with olive oil or melted butter, and sprinkle herbs like rosemary, thyme, or a pinch of garlic powder before baking. This step infuses your toast with aromatic layers, turning simple slices into tantalizing bites.
Q5: How do I avoid burnt or unevenly toasted bread?
A5: Keep an eye on your bread,especially towards the end of baking. Using a wire rack helps with even heat distribution, but ovens vary, so it’s good practice to flip the slices halfway through. If your oven runs hot, lower the temperature slightly and extend the toasting time for gentler crisping.
Q6: What’s the trick to make toast extra crispy but not dry?
A6: Timing and moisture balance are key. Don’t over-toast beyond golden brown, as that leads to dryness. Also, using slightly thicker slices helps retain some internal moisture. A light drizzle of olive oil before baking seals in flavor without sacrificing crispness.
Q7: is it possible to reheat oven-toasted bread without losing crunchiness?
A7: Yes! To revive day-old toast, pop it back into a preheated oven at 350°F (175°C) for 3-4 minutes. This gentle refresh warms the bread through and brings back the crisp texture as if it were freshly made.
Q8: Which baking tools enhance the oven toasting experience?
A8: A wire cooling rack atop a baking sheet is your best friend for airflow and even toasting. For extra efficiency, use a baking stone to mimic bakery conditions, or a silicone mat if you prefer easy cleanup. Tongs also help when flipping slices mid-toast without disturbing the heat balance.
Q9: Can I toast bagels or English muffins in the oven?
A9: Definitely! Slice them in half, place cut side up on a baking sheet, and bake at 375°F (190°C) for about 5 minutes.This technique crisps the interior while softly toasting the exterior, perfect for spreading your favorite toppings.
Q10: What creative toppings pair well with oven toast?
A10: Think beyond the usual butter or jam. Avocado smashed with lemon and chili flakes, whipped honey ricotta, or even a sprinkle of toasted seeds add texture and vibrant flavors, turning your crispy toast into a gourmet delight.
Mastering the art of oven toasting opens up a world of textured, flavorful bread possibilities. Whether it’s a quick breakfast or a sophisticated snack, these tips promise your slices will emerge crisp, golden, and irresistibly delicious every time.
In Summary
With these simple yet effective tips,mastering oven toast is no longer a mystery but an achievable art. from choosing the right bread to perfecting the temperature and timing, each crispy slice becomes a little victory of texture and flavor. so next time you fire up your oven, remember: patience, precision, and a touch of creativity are your best ingredients for that golden, crunchy toast that elevates every breakfast, snack, or meal. Happy toasting!